Sometimes, makers just need to take things up another level. Typically, 3D design and creation are fun and fruitful experiences for students of all ages but those who have mastered some of the basics tend to crave a fresh challenge. And, that is totally fine since, as we'll learn in this edition of the Eduporium Experiment, your 3Doodler PRO+ 3D printing pen provides that extra burst of excitement. Designed for inventors with some 3D design experience, the PRO+ empowers kids to take their designs to the next level. Besides that, it offers a truly professional-grade experience—one students won't find with any other 3D printing pen.
So, what makes the 3Doodler PRO+ such a noteworthy MakerEd tool? It starts with the improvements and features that aren't in the other 3Doodler 3D printing pens. For starters, the PRO+ includes a customizable temperature and speed system. Children can take complete control of their projects from start to finish and apply this professional-grade technology to personalized projects. From designing concepts to completing prototypes, the 3Doodler PRO+ helps them perfect 3D formations each time they use it.
Besides these enhanced controls, the PRO+ also differentiates itself with the filament options it offers. A lot of times, students are limited in the filament types they can use with even the most popular 3D printers for education as well as other 3Doodler pens. The PRO+, however, is compatible with various different types of materials beyond traditional 3D printing filaments, like ABS and PLA. In fact, it features the largest range of compatible materials in this market. They include everything from wood and metal to nylon, bronze, and copper, providing for a truly unique 3D printing experience.
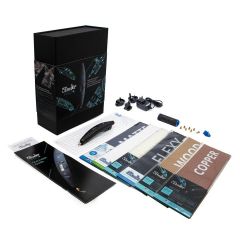
Each 3Doodler PRO+ set comes with all of these filaments. Each pack includes six different filament types with 150 filament strands in total. As we mentioned, your PRO+ kit comes with the nylon, wood, and metal filaments and they also include Black ABS, White PLA, and Black FLEXY (25 strands of each). Besides the pen itself, each of these kits also comes with a 3Doodler Nozzle Set with six nozzles, a smoothing tool, an unblocking tool, an instructional manual, and a power adaptor set. So, whether students are constructing simple projects or taking on something bigger, the PRO+ and its accessories can certainly help. Also, the six nozzles are each different shapes, giving students freedom to switch things up as often as they'd like.
When it comes to choosing a filament for your prints, each option provides guaranteed speed, safety, and efficiency. Despite being much less common than the ABS and PLA filaments, the wood, metal, and nylon options are super effective. Whichever material students are using, however, the 3Doodler PRO+ provides ideal output. These efficiency features account for one specific upgrade when moving from the 3Doodler Create+ to the PRO+ and they provide students with new and unique opportunities for 3D printing.
Since it is powerful enough for seasoned architects and engineers, the PRO+ provides kids with this same efficiency. Not only can they use it to design and test models in a makerspace, students can leverage their 3Doodler PRO+ pen to illustrate all-new design concepts, communicate creative ideas, and bring abstract ideas to fruition in three dimensions. It also features a built-in dual-drive system that provides your makers with more control of designs. Additional benefits include added precision and accuracy in final products.
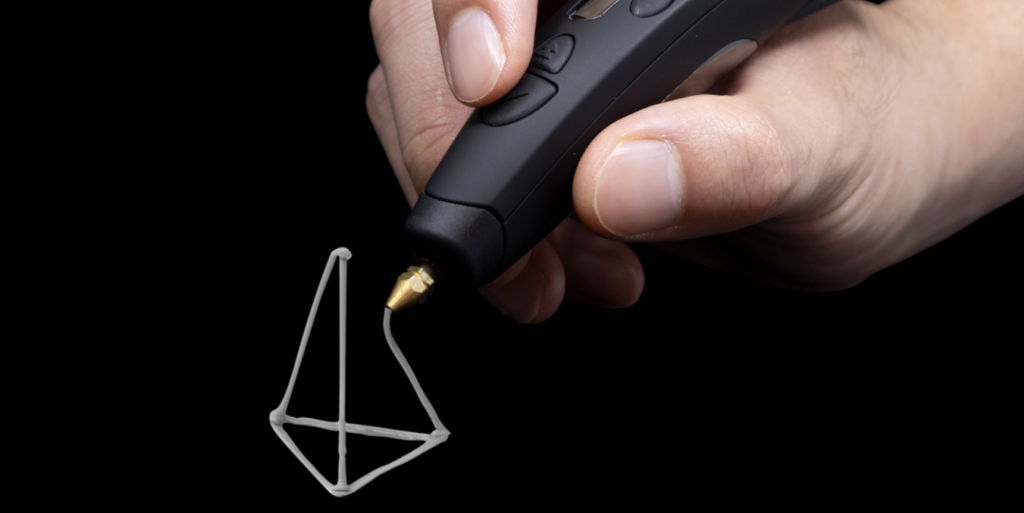
This pen embodies greater power and precision, so students can complete their designs much quicker. As for its surface, the 3Doodler PRO+ features a sleek and ergonomic shape that's ideal for versatile STEAM projects. It rests comfortably in the hands of students and makers, allowing for increased productivity and mobility. Further, students can control its speed and temperature with tactile buttons and a digital panel no matter which filament they're using. They could scroll through the filament options using the arrow buttons and select their preference from their on-screen options. And, speaking of those filaments, the six included packs provide kids with 125 feet worth of filaments. As the filaments expand during this extrusion process, students get over 1,500 feet worth of materials.
You can find the different filament options on our store and at the bottom of this post. While it is possible to use the DoodlePad with the 3Doodler PRO+, it's only compatible with some of the filaments and could also lead to some damage to the pads. The DoodlePad won't work with the FLEXY or metal filaments and wood only works on the backside of your DoodlePad. The DoodlePad compatibility this does provide, however, is another example of the versatility the 3Doodler PRO+ unlocks across STEAM education.
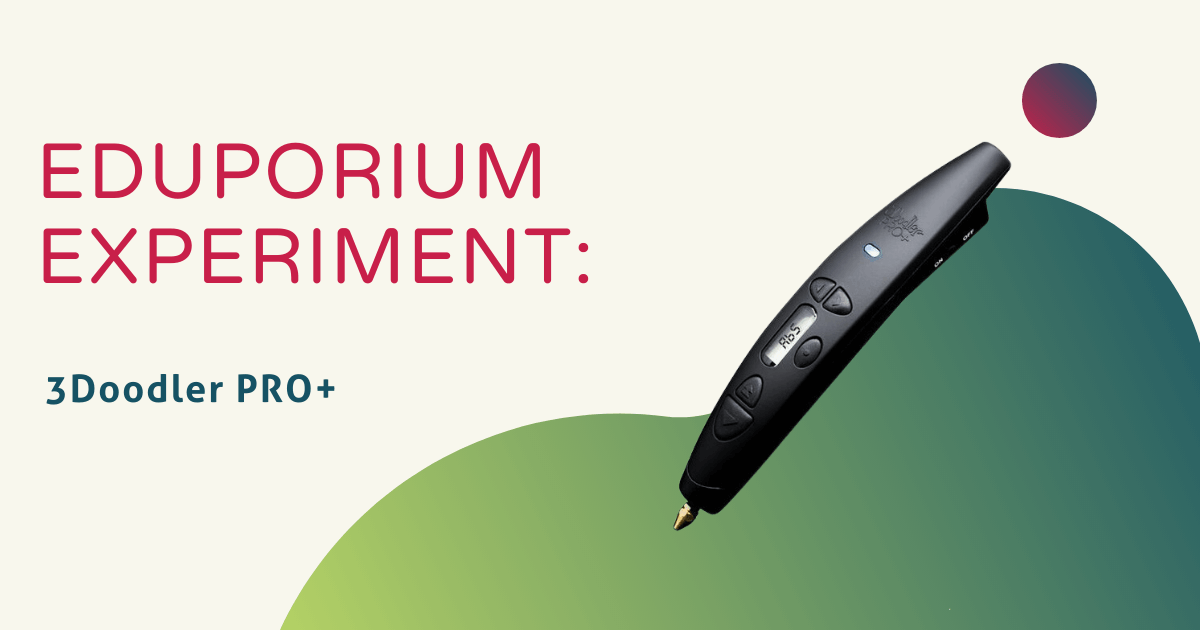
When it comes to controlling the PRO+, as we mentioned, it's easy for children to identify and utilize these various buttons and components. Since the PRO+ must be connected to power while in use, students can start out by identifying where the power adaptor connects. There's a small port on the back end of the pen, where students can plug in their cord. There are also five buttons in total on the front side of your 3Doodler PRO+ pen. In the image below, each is identified to help students locate them when they're getting started. Going in order, these include the feed button (1), reverse button (2), menu/enter button (3), menu navigation buttons (up is No. 4 and down is No. 5), and the on/off switch is located off to the side.
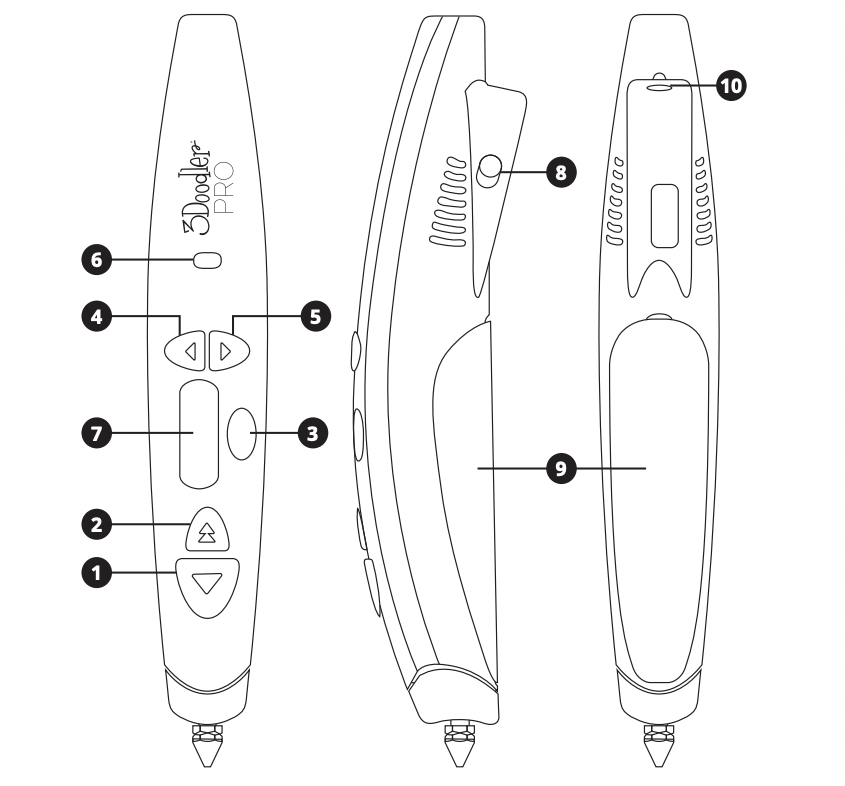
The great thing about the PRO+ is that students could control so many of its functions using the navigation arrow buttons. This allows students to select the filament type they're using, set the pen's print speed, and control its temperature. After choosing a filament, speed, and temperature, students will then need to click the menu/enter button to confirm their selection. Also, students should pay close attention to the indicator light on the pen (No. 6). When it's red, that means the pen is heating up or no setting has been selected. If blue, this means the pen is feeding on a pre-set temperature mode and, if green, it means the pen's set to custom mode. If it's flashing blue, that means it is reversing in a pre-set temperature mode and, if its light is green, that means it's reversing in custom mode.
The LCD screen displays both the current temperature of the pen and the filament kids selected. In custom mode, students can set their own temperature and speed. As for the filaments, they can refer to the screen at any time to see which one is selected. It will display an abbreviation for the corresponding filaments. For example, wood should display as 'OOD,' bronze always displays as 'BRO,' copper displays as 'COP,' ABS displays as 'AbS,' PLA displays as 'PLA,' nylon displays as 'NYL,' and FLEXY displays as 'FLE.' Once they choose their filament type, students can start loading in the strands through the back of the pen.
To insert filaments in the 3Doodler PRO+, be sure the power is on and that the indicator light is blue. Then, slide your filament strands through the feed port and click the feed button once. You should hear the drive gear start and then you can gently push the filament down into the feed port. Wait a few seconds and your filament should then start to extrude through the nozzle. Finally, pressing on the feed button once more will pause extrusion. To doodle in 3D, students can simply use the 3Doodler PRO+ like a pencil. By mimicking a writing motion, they should be able to create the 3D shape they need—starting with a 2D design on their doodling surface and then lifting their hand off the surface to add that third dimension of height.
There certainly are a whole lot of possibilities when it comes to creating STEAM projects with the 3Doodler PRO+ 3D printing pen. It's definitely ideal for those students with some 3D printing, engineering, or design experience under their belt. To learn more about the PRO+ and this variety of filament options, click below to visit our store. You can explore our 3D printing section to find all our 3Doodler offerings. If you have a question about the PRO+ or other 3Doodler pens, please contact us. Follow us on X and Instagram, too.


