Over four million students are coding and learning with micro:bit around the world. But what makes it so popular? Part of micro:bit’s appeal is its versatility—students can combine it with other tech tools, incorporate it into a craft, or program it with multiple coding languages. Students usually start out coding micro:bit with Scratch, a block coding language. But eventually, they’ll need to progress to more advanced text coding languages. To guide them through this transition, the Micro:bit Educational Foundation released a Python Editor designed to help students evolve their coding skills. The editor brings together a familiar STEM tool and one of the most well-known coding languages in the world.
Get familiar with micro:bit
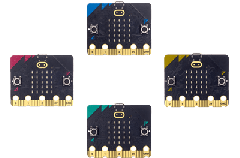
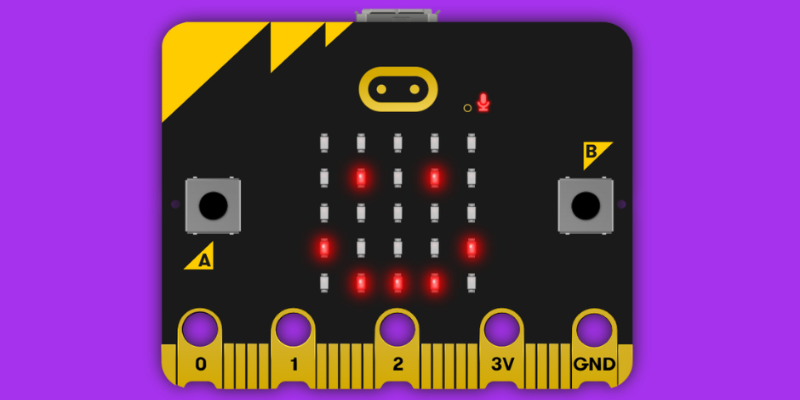
Conceptually, micro:bits are quite simple: a pocket-sized programmable computer for students. But the device’s functions are far more complex. The micro:bit comes with sensors that can measure light, temperature, sound, movement, and magnetism, all of which students can incorporate into their code. They can also touch the logo to trigger certain programmed actions, such as lighting up a design. And they can attach micro:bit to other devices with alligator clips, safely providing a computing element to crafts or robot builds. All of these options make micro:bit a powerful coding tool despite its compact size.
For those looking to tap into micro:bit’s full potential, it offers plenty of coding options. Almost anyone can program effectively with this little computer. Beginners can become familiar with the programming process through Scratch in the micro:bit MakeCode editor, then move to JavaScript in the same coding environment. These two languages are the most popular to use with the micro:bit due to the MakeCode editor’s accessibility. However, micro:bit is compatible with Python, as well. In fact, a full reimplementation of Python 3, called MicroPython, was created for the micro:bit, giving young programmers access to even more coding opportunities.
Why choose Python coding?
Python is the ideal starting point for young students to begin text-based coding. It’s one of the most approachable programming languages, with a naturally readable structure that helps students transition away from block or hybrid coding. Python is taught in schools worldwide, even as early as elementary school. But it’s still powerful enough to be used in areas such as web development, data analysis, and machine learning. When students learn to code in Python, they’re learning a skill that will serve them throughout their lives. Even if they never code in the workplace, the logical, systematic thinking they will learn is a valuable asset to their mental toolbox.
Using the micro:bit Python editor
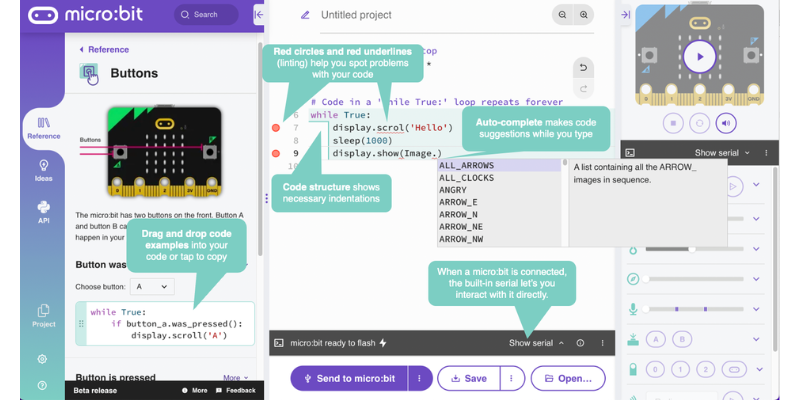
The structure of the micro:bit Python editor is similar to familiar block code environments, with commands on the left, editing space in the middle, and a simulator on the right. However, this editor has some unique additions to guide students through their first foray into Python. Although Python is in English, students can change the (global) language of the coding interface and instructions, with options for English, Catalan, Chinese, Dutch, French, and more. They can also save their programs in the editor or locally on their computer, allowing them to work from anywhere. Plus, the editor has other educational features, explained below, which give students a helpful knowledge boost. The goal is to create students who are confident in their coding ability without throwing them into the deep end.
Hints for Python Coding with micro:bit
Part of building students’ confidence is understanding common fears that they face when learning to code. Some students don't know where to start with Python coding, especially if they’re used to the guidance of block code. Others struggle with knowing how to fix mistakes or are afraid of making them in the first place. Still others worry about understanding the structure of the code and how it flows together. To address these issues, the MicroPython editor includes several useful guides for students to reference while writing Python code. They may face a blank screen, but with a little prompting, they’ll be writing their own code in no time.
References
In block coding, students get to drag and drop blocks of code into the editor. But with Python, they have to type the code out themselves. To help them navigate this change, the micro:bit Python editor includes helpful hints, found on the left side of the interface. The first hints come in the Reference section. This tab explains what the micro:bit can do, such as creating a loop of code or displaying a design on the LEDs. Clicking on an option shows descriptions of each function and its corresponding Python commands. For example, the Display reference section tells students that they can program built-in images, words, or numbers to show on the micro:bit’s LEDs. Then, they can either copy or drag and drop the display codes into the editing section. This way, students have a starting point for their own code, which they can easily customize however they want.
Ideas
Underneath the Reference section, students can also find the Ideas tab, with plenty of project ideas for inspiration. The Ideas section is where the Reference section’s commands are put into practice. The Reference section taught students that they could display numbers on the micro:bit, for example, but the Ideas section shows them what they can do with those numbers. One such application is a Step Counter. In this program, the micro:bit detects movement like walking or running and shows the value of the steps on the LED display. Just like the Reference section, code snippets in the Ideas section can also be dragged to the middle editor for students to work on.
MicroPython API
As another guide, students can also access the MicroPython API to see all the possible commands they could use. The API is similar to the Reference section, as it shows all the different functions of the micro:bit. However, the Reference section provides broad overviews of the functions with explanations, while the API acts almost as an index. It displays more specific, smaller sections of code which control particular commands, rather than the Reference’s explanations of entire functions. If the amount of options becomes overwhelming, students can also use the search bar to find information about a particular piece of code.
Troubleshooting your Python code
Despite all these hints, students will still get stuck at times. But the micro:bit Python editor has several helpful troubleshooting options. The editor highlights different areas of students’ Python programs, creating color-coded blocks to show the code’s structure. Students can better understand the cause and effect within a program by identifying its various parts. If studying the structure doesn’t reveal the errors, though, students can use the Error Highlighting feature in the editor. Symbols will appear next to any lines of code containing bugs. Students can figure out the issue from there or hover over the circle in the margin to see a full explanation of the error.
micro:bit Python code simulators
There are two different simulators students can use to view their code on micro:bit. The first simulator is more of a visual aid to see what a certain output would look like on the device. Students can add virtual alligator clips to the micro:bit, change its color, or choose from a selection of images to display on the LEDs. They can also write a message to scroll across the virtual screen and choose whether or not the message should repeat. Although this simulator is very simplistic in terms of functionality, it’s very helpful for visualizing an end result. Students can see exactly what their goal will look like on the micro:bit—then, they just have to write the code to get there.
The second simulator is built into the MicroPython editing environment itself. On the top right of the screen, students can run their code on a virtual micro:bit by pressing the ‘play’ button. Unlike the first simulator, this version actually demonstrates the outcome of a particular program. Students can see whether their code works before transferring it to a physical micro:bit. This simulator is more capable than the former, with the ability to play sounds and customize the code. However, the best way to use the simulators is to combine their functions. First, figure out an ideal outcome by playing it on the visual simulator. Then, write the code and preview it on the simulator within the editor.
Teaching with MicroPython
The micro:bit team has provided several tutorials for teachers (or students) starting to code with Python. Both teachers and students can use the tutorials to become familiar with the micro:bit’s inputs and outputs, practice some beginning code, and learn about the MicroPython API. In fact, the micro:bit team has kept the MicroPython software completely free and accessible to everyone, so it’s easy to get started. For teachers already familiar with micro:bit, check out the Developer Guide at the bottom of the documents to learn about more advanced options, such as using the micro:bit on macOS or Linux. And you can explore Computing at School’s resources to find more micro:bit lessons for teaching Python.

Other ways to code micro:bit with Python
Although the MicroPython online editor is the most convenient way to code with Python on micro:bit, students can also use Mu, an offline code editor, for the same purpose. They could also use the micro:bit MakeCode editor, just as they do for block coding. However, the MakeCode editor uses a different version of Python (not MicroPython), so some of the logistics will differ. Finally, students could use uFlash, a command line tool that flashes raw Python scripts onto a micro:bit. This method is only for more advanced students, as it involves encoding Python into a hex format for transferring to micro:bit. Instructions can be found at the uFlash website.
Start coding micro:bit in Python today
If you’re ready to add Python to your library of micro:bit coding tools, head to the MicroPython editor or grab your own micro:bit on our store. Don’t be intimidated—the tutorials and lessons are there to help you out, and your students will likely catch on quickly. In fact, the youngest contributor to the creation of MicroPython was only 11 years old! If you have any questions, don’t hesitate to reach out to us, and be sure to follow our newsletter and socials for the latest on micro:bit and coding.